SUNWAY > BLOG > AVR Blog > how to install AC voltage stabilizer: A Step-by-Step Guide
how to install AC voltage stabilizer: A Step-by-Step Guide
Voltage fluctuations are more than just a nuisance—they can shorten appliance lifespans, cause unexpected shutdowns, and even pose safety risks. An AC voltage stabilizer ensures a steady voltage supply, safeguarding your air conditioners, refrigerators, computers, and other sensitive equipment. In this post, we’ll cover how to install an AC voltage stabilizer properly, so you can enjoy consistent performance and peace of mind.
Why You Need an AC Voltage Stabilizer
Protect Equipment: Prevents damage from under‑ or over‑voltage spikes.
Improve Efficiency: Appliances run at optimal voltage, reducing wear and power waste.
Enhance Safety: Minimizes risk of electrical fires or malfunctions.
By following this AC voltage stabilizer installation guide, you’re investing in the longevity and reliability of your home or office devices.
Tools & Materials Checklist
Before you begin, assemble everything you need:
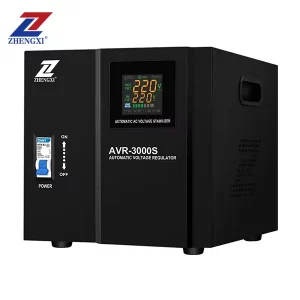
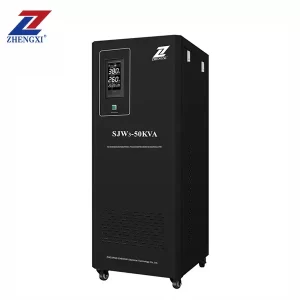
AC voltage stabilizer unit (rated for your load)
Screwdrivers (flathead & Phillips)
Insulated wire strippers/cutters
Appropriate gauge copper wiring
Mounting screws, anchors, and drill (if wall‑mounting)
Multimeter for voltage checks
Protective gloves and safety goggles
Having these items ready streamlines the process and avoids last‑minute runs to the hardware store.
Step-by-Step Installation
4.1 Choose the Right Location
Ventilation: Ensure at least 10 cm clearance around the stabilizer for proper air circulation.
Dry Environment: Avoid damp areas to prevent corrosion.
Accessibility: Position near the main incoming power line for shorter wiring runs and easier maintenance.
4.2 Mounting the Stabilizer
Mark Drill Points: Use the mounting bracket as a template to mark on the wall.
Install Anchors: Drill holes and insert wall anchors suitable for the load.
Secure Unit: Screw the stabilizer bracket firmly, then hang the unit, ensuring it sits level.
4.3 Making the Electrical Connections
⚠️ Warning: Always switch off the main power supply before wiring.
Input Side:
Connect the live (L), neutral (N), and earth (E) wires from your main breaker to the corresponding input terminals on the stabilizer.
Output Side:
Run new wires from the stabilizer’s output terminals to the distribution board or directly to high‑priority appliances.
Ensure wire gauge matches the unit’s capacity (e.g., 4 mm² for up to 5 kVA).
Tighten Connections: Use a torque screwdriver if specified by manufacturer to prevent loose contacts.
Grounding: Double‑check that the earth terminal is properly bonded to your building’s earthing system.
4.4 Powering On & Testing
Restore Power: Turn on the main breaker.
Observe Indicators: Most stabilizers display input/output voltages—verify they’re within nominal range.
Load Test: Switch on a connected appliance and confirm stable operation without flicker or fluctuation.
Final Check: Use a multimeter to spot‑check at various outlets.
Best Practices & Safety Tips
Regular Maintenance: Inspect terminals and clean any dust every six months.
Load Monitoring: Avoid running the stabilizer above 80% of its rated capacity to improve lifespan.
Surge Protection: Consider adding an external surge protector if your area experiences frequent lightning strikes.
Professional Assistance: If you’re uncomfortable with high‑voltage wiring, hire a licensed electrician.
Common Issues & Troubleshooting
Issue
Possible Cause
Solution
Stabilizer not powering on
Blown internal fuse
Replace fuse per manufacturer’s guide
Output voltage too high/low
Incorrect wiring or settings
Re‑check connections and voltage dial
Overheating
Poor ventilation or overload
Improve airflow; reduce connected load
Frequent tripping
Ground fault or short circuit
Inspect wiring; fix insulation damage
FAQs
Q1: Can I install the stabilizer myself, or do I need an electrician?
While many homeowners can handle installation with basic electrical knowledge, hiring a licensed electrician ensures compliance with local codes and peace of mind.
Q2: How do I choose the correct stabilizer capacity?
Calculate the total wattage of connected appliances, add a 20% safety margin, and select a stabilizer rated slightly above that figure.
Q3: Where should I place the stabilizer relative to my appliances?
Ideally, mount it near the main distribution board to minimize wire length and voltage drop.
Q4: How often should I service my AC voltage stabilizer?
Inspect every six months for dust, terminal tightness, and indicator readings. Annual professional servicing is recommended for commercial setups.
Q5: Will the stabilizer work during a blackout?
No. A voltage stabilizer regulates existing power; to operate during outages, consider adding a UPS or generator.
Conclusion
By installing an AC voltage stabilizer correctly and scientifically, you not only extend your appliances’ lifespan but also ensure they run smoothly amid voltage fluctuations. Simply choose the right location, follow safe wiring practices, and perform regular maintenance—and you’ll enjoy stable power for years to come. SUNWAY’s home stabilizers up to 2 kVA come with pre‑installed power cords to eliminate messy wiring—contact us now for a free, customized quote and safeguard your power needs!